|
As a Virtual Assistant, I sometimes make appointments for my clients, which includes sending meeting invitations to attendees. If you follow the easy steps below, you can send a great invite, regardless of what calendar program you may be using. Choose a title that makes sense to everyone This is a screenshot from Google Calendar when I open a new invitation window: 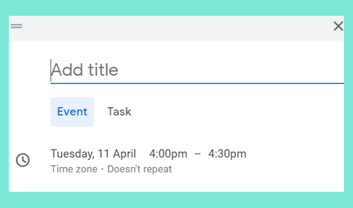 The title is critical. Keep in mind that this is going to be added to the calendar of both the people participating in the meeting, so it needs to be something that is meaningful to everyone. So while “meeting with Mary Smith” might make sense to you, that’s what Mary Smith will see on her calendar, a label that doesn’t show her at a glance who she’s meeting with. My suggestion would be to use both names of the people involved. 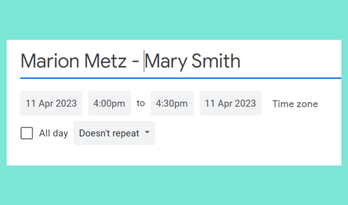 Provide specific instructions Explain the meeting type and any instructions necessary. To do this, in most calendar software you’ll need to expand by clicking More Options (in Google) or More Details (in Outlook). Look for the location field and either add the meeting address or calling instructions as appropriate. 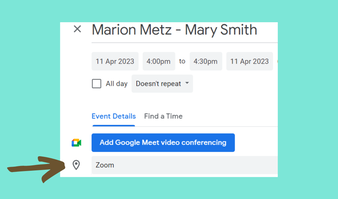 I usually check that the invite is correct by double-clicking it on my own calendar before sending it to the person. Once all is fine, I just add the invitee’s email address and choose any applicable permissions below (to modify the event, invite others or see the guest list) and click Save. 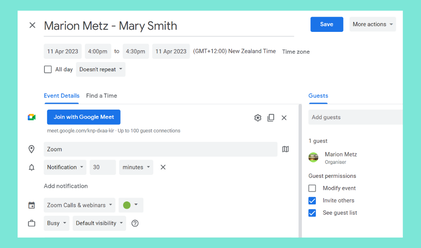 Your invitee will receive an email invitation that they can add to their calendar.
There are minor differences between Google Calendar, Outlook, and iCal, but if you understand the basics, you can translate this to any software that you are using. It’s best to follow up the day before to make sure the meeting is still on track.
0 Comments
Leave a Reply. |
AuthorHi, I am Marion of Marion Metz Solutions Archives
July 2024
Categories
All
|
 RSS Feed
|
|
Marion Metz Solutions
Solutions for impact driven business owners and authors Southland, NZ |
|

Find the Terms and Conditions and the Privacy Policy for this website here